Rock On

We found this awesome rocking chair a few months ago, on the same night we picked up this little side table.

IMG_3137

It was a very successful evening for furniture rescues. We also found a set of four vinyl chairs which are patiently waiting for their makeover for an upcoming blog entry…

The former owners of this rocker were moving and we can only assume had no use for this so we picked it up and immediately went to work on making it over.

By immediately we of course mean it sat in our storage locker for a month or two, or four….

Nonetheless here is the surprisingly easy makeover for the little chair that could.

Side note this may be the first and last chair makeover as painting the rungs on this chair was just not very fun.

The hardest part was still recovering the seat, or rather pulling the old fabric off. Minor injuries may have been sustained pulling out the numerous staples on the seat of the chair but lesson learned: always use proper tools and non-slip surfaces when removing staples.


IMG_1929

Choosing the fabric of the chair was easy, once we discovered the clearance section of Fabricland that is. Added bonus; since we fully overestimated the amount of fabric we would need there is lots of leftover for future projects!

With the help of our Dad’s staple gun we finished re-covering the seat and fitted it back into place.

The finished product is bright, cheerful and ready to rock on.

IMG_3162IMG_3162


Adding Christmas cheer with old frames

Hi all!  Happy Holiday time!  I really should have posted this sooner because Christmas is only a couple of days away!  Here is a project that we have done to give our place some Christmas cheer.    We have been collecting old frames over the past couple of months and haven’t been sure what to do with them yet.  I knew I wanted them white.  I do like the gold finish they previously had but a white finish goes better with our condo.

Image

 So a white paint went over top of the frames we had.  At the dollar store I ended up finding a big sparkly bow that added just enough glitz. It was perfect to go in the middle of the oval frame we had. I secured the bow with some ribbon and done!

Image  Image

Our other frames were a bit more of a time consuming project.  Sarah had an idea to make stars out of sticks to hang in the middle of the frame.  It took a bit more patience to hot glue the sticks together and then to get them to stay glued together!  Once that was accomplished we added some sparkle to the sticks with the help of mod podge. This way they would still stand out against the darker coloured wall we were putting them on.  Definitely love how its festive looking but not without overdoing it!

Image

Christmas is in full swing at the Finleys

xmas decor pics 042

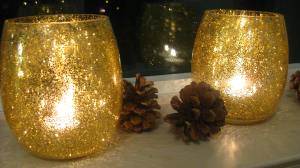
These candle holders are beautiful and so easy to do!  This past weekend we hosted a joint party to celebrate both my birthday and the holidays.  This prompted us to put some Christmas decor ideas into action.  Lets just say its all about the sparkle!

I had been wanting to try this candle holder project for awhile because it adds some beautiful ambiance to any room.  You take some clear glass vases which can be found at the dollar store.  You also need some mod podge and some sparkles!  I tried the dollar store sparkles first but I found I preferred the selection at Micheals.

Just slather the mod podge with a paint brush all over the inside of your soon to be festive candle holder.   Then sprinkle the glitter all over the glue, turning the glass holder as you go!  The glue will dry clear so don’t worry about the white streaks from the glue.  This project was very easy and very festive especially when  lit up!

xmas decor pics 041

A Bright Mini Table Makeover!

Here is another side table over haul.  Doing a smaller piece of furniture when you are just starting out in revamping older pieces is definitely a good idea. It doesn’t take as much time to make an impact and you learn lots along the way.

Its important to clean the piece first.  That may mean using some elbow grease.  This table definitely needed a little TLC.  Murphy’s Oil is your best bet when doing this because it cleans the wood safely and effectively

old tableolder drawer

The side table felt like it may suit a child or a young adults bedroom so we decided to go for a bold, bright, fun colour.  Some tips when picking your colour.  First have an idea of what colour palette you may want to go with before heading to the store.  We all know there are so many possibilities out there today!  But if you don’t want to peruse for ages, have an idea of what you’d like to see, otherwise it can be very overwhelming when trying to decide.

Second pick up some colour swatches at the store for possible choices. If you are like  my sisters and I, we  tend to get distracted by  all the colour options.   At least we ended up taking home some  swatches for future projects.

007

We ended up choosing a  latex interior furniture paint by Para in sea grass found at Lowes. After a lot of sanding because of the poor paint job done previously, this beautiful colour was applied.  This  paint really worked well for the project!

bright table and xmas crafting 015

And of course the drawer had to be beautified as well.  This wall paper we found at a discount store.  It adds a bit of a country feel, but I also think it complements the whole look of the table.  Lets not forget to mention this updated knob we found.  Also at Lowes on sale!  Its great when you actually find something that will work…. and its on sale!

bright table and xmas crafting 018bright table and xmas crafting 016

This bright tropical colour has helped to chase my winter blues away!….

For now!

The Tale Of My Purple and Red Striped Dress

I absolutely love thrifted/ vintage clothing finds. I love their uniqueness, I love hunting for them, I love wondering where they have come from and how they came to find me. Most of all I love taking a piece and making it over to give it a new lease on life as part of my wardrobe.

I found this dress at the Toronto Vintage Clothing Show (heaven on earth in my opinion), it was an absolute steal at $5.00 and I knew it would be any easy makeover, and seriously check out the potential of this dress!


The length of the skirt and sleeves was a bit on the frumpy side, as such they were the first to go under the scissors. Nothing like a quick hemming job to update a piece.


Once shortened I set to work adding a collar, because really what self-respecting dress would be seen without one.  Don’t you think the before picture looks like it is missing something?

* Sidenote I am in love with the label on this dress, it’s just so cute! *


Luckily I had lots of material to make a collar once I snipped some inches off of the skirt.


Adding a collar to the dress was easy. I just had to open up the seam, slip the collar I made inside and stitch it back up. Sometimes I feel like a plastic surgeon for clothes.


I’m really happy with end result of this dress, and that of course means photo shoot of the finished product!